Showing posts with label handmade. Show all posts

Thursday, May 08, 2014

People Creating Magic: FabulousCatPapers + giveaway!!!

This girl makes japanese notebooks. This girl embroiders. You will be thrilled to see what amazing things she creates combining these two. She conveys creatures and objects  from the 3d world on 2dimensional  paper surfaces. The form is scattered and recombined dot by dot on a new level. The thread turns to paint and the needle turns to brush. Notebooks or pieces of art?

Everyone, meet Chara from Greece. The wizard of "FabulousCatPapers".


------------------------------------------------------------------------------------------------------
  People Creating Magic, the game of fives
 • Fabulous Cat Papers •
------------------------------------------------------------------------------------------------------


 ------------------------------------------------------------------------------------------------------

▲ TELL US ABOUT YOUR MAGIC

1.  Who are you and what kind of magic do you make?
I'm Chara and at this time of my life, I make Japanese notebooks, lately embroidered. I love paper embroidery, and I like the unusual.


2.
Where does your inspiration come from?
Everywhere! Japan of course that I admire in many ways, but also from nature, sciences, anatomy, arts, other people's interests and so many more.
It's kind of an infinite list, I think almost everything is interesting in some way.

3.   What are your favorite materials and tools?
All kinds of papers, threads, needles and my little awl!

4.   What did you want to be, when you were a child?
Many things… astronaut, teacher, dancer, singer, scavenger (!)

5.  What was the first thing you ever made?
Not really sure, since the most vivid memories of mine are of times I actually destroyed things so as to understand how they were made of.
So, I have to say, smashing a watch with a hammer at the age of 5.
I have smashed many things, and continue to do so,  before actually creating.


▲ LET'S PLAY "CHINESE PORTRAIT"

1. What would you be, if you were a color? 
Charcoal I think…

2. What would you be, if you were a sound? 
Atonal music.

3. What would you be, if you were an animal? 
A cat of course…

4. What would you be, if you were an object? 
A road

5. Who would you be, if you weren’t yourself? 
One of my beloved friends I hope!


▲ PLEASE SHARE WITH US:

1.  A moment of the creating process:
The anxiety to see the final product after the work is complete, to never really know from the beginning if it will be be beautiful…


2. One word that defines you as an artist:
Persistence.


3.  One word that defines you as a person:
Absolute?


4.  Something you love and something you hate:
Friend I adore, circumstances I hate.

But this is a big chapter…. 


5.  Five facts people do not know about you:
I am an open (note)book, no secrets here.   ;-)


▲WHERE CAN WE FIND YOU:
 

Etsy: www.fabulouscatpapers.etsy.com
Facebook: https://www.facebook.com/pages/Fabulous-Cat-Papers/330562830328702
Pinterest: http://www.pinterest.com/fabcatpapers/
Dawanda: http://en.dawanda.com/shop/FabulousCatPapers


__________________________________________________________________________________

✿ G I V E A W A Y  
___________________________________________________________________________________


Chara is giving my blog readers the chance to win this AMAZING handmade A5 notebook, pictured above!
TO ENTER: leave a comment to this post saying which one is your favorite item from FabulousCatPapers shop.
 
Then use the rafflecopter app below to validate your entry and push the +1arrow on the right side of every option to read what you have to do for extra entries and more chances to win!!! 
This is an international giveaway.

The giveaway will be on until May 31st 12:00am.
The winner will be announced on June 1st!

  a Rafflecopter giveaway

GOOD LUCK everyone!!!!  

Thursday, June 27, 2013

Flowery, floral, flower summer accessories!

New collection on board!
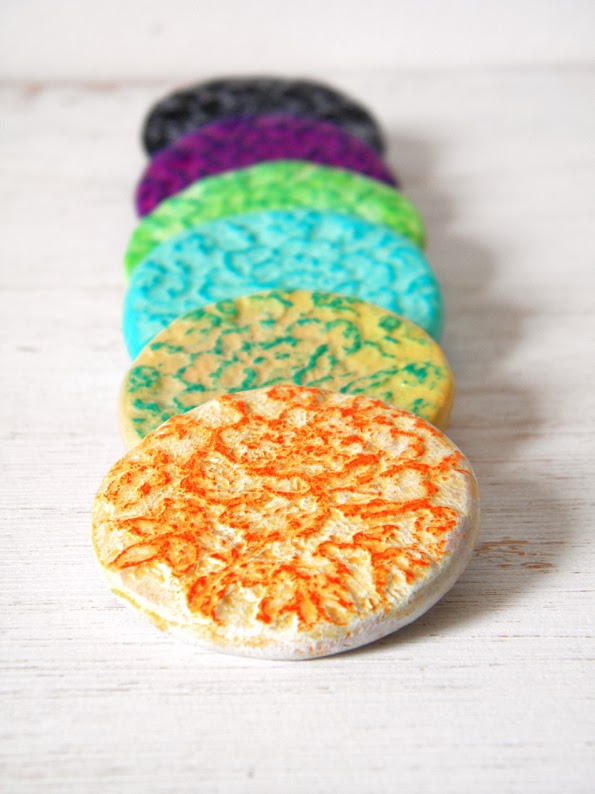
Floral patterns are embossed on the surface of these romantic and elegant accessories!


Many vibrant and pastel color combinations for the summer!
✿✿✿ You can request a custom color combination!
or even a custom number of different brooches for bridesmaids accessories!✿✿✿


 For more info contact BlackRedDots on FB or on my etsy shop .


Monday, May 13, 2013

People Creating Magic: Alexandra Soury


There is a girl that gives life to people from the fairyland! She is such a sweet person, you could think she is a fairy herself! She is very creative, with admirable imagination! She combines elegance, purity and darkness in the most wonderful way! I'm very happy to announce a new series of posts, called "People Creating Magic" and I'm thrilled that the curtains open with such an amazing artist!
Everyone, meet Alexandra from France! The wizard of "Cute Amalia".

Augustine
------------------------------------------------------------------------------------------------------
  People Creating Magic, the game of fives
 • Alexandra Soury •
------------------------------------------------------------------------------------------------------

------------------------------------------------------------------------------------------------------


▲ TELL US ABOUT YOUR MAGIC

1. What kind of magic do you make?

I create Art Dolls 

Anna and Moira

2. Where does your inspiration come from?

I find my inspiration in all details around me: Nature, illustrations, photographs, (Pinterest is a great site to find the details that will trigger inspiration) some movies especially those of Tim Burton, I really appreciate the illustrations from antique books for children (specifically Alice in Wonderland) , the storybooks and legends.
I can't give a clear explanation, the ideas come suddenly and I draw quickly on a sketch book not to forget.

3. What are your favorite materials and tools?

I use air dry clay, cold porcelain (to do accessories ) ,needle felt, laces and acrylic paintings .

4. What did you want to be, when you were a child?

Egyptologist ,antique dealer and  museum  curator

5. What was the first thing you ever made?

When I was a child ,when I got to eat at my grandmother for lunch, I was playing with plasticine and I created a lot of small animals, no bigger than a fingertip, I loved making swans and lizards! I also drew all the time!

Alice
    LET'S PLAY "CHINESE PORTRAIT"

    1. What would you be, if you were a color?  
    blue arctic

    2. What would you be, if you were a sound? 

    the song of a bird (sometimes pleasant and sometimes very painful!)

    3. What would you be, if you were an animal?  

    a horse

    4. What would you be, if you were an object? 

    an antique book

    5. Who would you be, if you weren’t yourself? 

    oh I wouldn’t be an other person ! 
     
    Cordelia
     
    PLEASE SHARE WITH US:

    1. A moment of the creating process:


    from drawing to life...

    2. One word that defines you as an artist.

    Meticulous

    3. One word that defines you as a person.

    Straightforward

    4. Something you love and something you hate. 

    I love dreaming , I hate human  stupidity

    5. Five facts people do not know about you. 

    I’m a compulsive collector
    I’m spiteful
    I have mice as pets
    I have an ugly head when I wake-up !

    Simone

    WHERE CAN WE FIND YOU:


    Romantic Alice


    Wednesday, March 20, 2013

    Changes!!! ...and a sneak peek!

    Spring is here... and it's time for changes!!!!
    My mood is really happy, flowery and creative and i can't wait to show you all the new things i have made!!


    Firstly I am really happy to announce a "blackreddots" Appearance Makeover.
    You can check the new look over @ my etsy shop: http://www.etsy.com/shop/BlackRedDots 
    but also here on my blog! 
    I would love to read your impressions. So tell me what you think at the comments bellow!
     

    And here's a sneak peek from my new jewelry designs. I've been struck by a inspirational thunder and i keep creating non-stop! Stay tuned... they can't wait to be published!
    :-)

    Thursday, September 27, 2012

    Back to School DiY - Notebook Makeover!


     Back to school!!
    Turn your dull notebooks into colorful, super trendy artworks!


    you will need:
    ✂ soft cover notebook  
    ✂ hard cover notebook
    ✂ fabric
    ✂ embroidery thread
    ✂ embroidery needle
    ✂ scissors
    ✂ white thick glue


    Thread your needle with the embroidery floss and make a little knot on the edge. Make a hole through the soft cover. Pull the thread all the way through and decide the shape you want to give.
    You might need to push the needle through the same hole over and over. Make sure you are not pulling too hard.


    Keep going with the long stitches adding new colors of thread.


    Stop when you feel you have the desired result.

    ✂ ✂ ✂ ✂ ✂ ✂ ✂ ✂ ✂ ✂ ✂ ✂

    Put the hard cover notebook on the fabric wide open (wrong side up).
    Draw a rectangle around, larger that the notebook. About 1,5cm for the top and bottom kai about 2-3cm for the sides.


    Start gluing the fabric on the covers using a thick glue and a paintbrush. If you use normal liquid glue you will end up with glue stains on your fabric. When you have secured the one side on the cover, pay attention to the spine. Make two slids for the spine piece and cut it off. Continue folding the side pieces and glue them down.


    When you finish you will end up with something like the photo above.


     For a cleaner finish glue the first and the last white page of the notebook onto the fabric you have just glued, hiding the trim pieces.

    You are done! Now you can decorate your notebook with ribbons, buttons, lace and anything you like!


    Have a great new school year!


    Monday, June 11, 2012

    Geometric stamps - Do it Yourself


    Geometric shapes are a big trend in 2012! This is a very simple way to make geometric stamps and refashion all your dull objects!

    Materials:
    *carving tools
    *erasers
    *exacto knife
    *stamping ink
    *wooden toy blocks *pen


    You can start from the easiest way. Cut the eraser rubber in squares and triangles. Your first geometric stamp is almost ready!


     Next step: mission circle! Draw a circle on the eraser, then cut the excess with the exacto knife and make the finish touches with the round carving tool!
    The secret in every stamp you make, is to regularly stamp on a piece of paper and check if the shape has flaws!


    You follow the same procedure for every shape, just remember that in repeated shapes you cut only half way down the rubber.


     Carve the shapes you want and then glue them on a wooden block. You have to do that, to ensure that the pressure is equal allover the surface when stamping.


    And you are done! You have created a geometric stamp set!
    You can restyle decorative objects, make paintings, decorate fabric or even clothes!
    Good Stamping!!!!


    Friday, April 27, 2012

    Spring DiY Project !!! - Upcycle flower pots!


    You will need: 
    1 old flower pot 
    3 or 4 smaller ones
    1 old broom stick (or metallic pipe)
    plants 
    soil

    You need a way to make your broom stick stable inside the big pot, so as to hold the weight of the smaller pots later on. You can use plaster or cement on the bottom of the pot. I wanted the most ecologic way so i used another pot! I made a few holes at the bottom and a big one in the middle for the stick. Pushed through the stick and filled it up with soil. I poured some water as i was filling it, to make the soil more compact. You can leave it to dry and push it hard to make it as compact as possible.


    Then put the big pot (upside -down) on top of your filled pot and then turn them both around (if you just turn the filled pot in the bigger one..you might end up spilling all the soil). Fill the big pot up with soil!


    Water the soil as to avoid any air between the small pot and the soil. Push the soil down with your hands.Try to move the stick towards the sides to check its stability!


    Now its time to prepare the small pots. Take a sharp knife and make some equidistant cuts at the bottom, trying to end up with a star. This is a very nice way to avoid large holes that let the soil go through when watering the plants, but also because the cuts add pressure on the stick and stay in place.


    Try to make your star on the side, to create this falling effect. Ιn this case i have used plastic pots. If you are using ceramics it is better to use the already made holes.


    When you are done with all the pots, just pushed them through the stick.
    Fill them up with soil, your favorite plants...and you are ready!


    A great solution for a tiny balcony! And a wonderful recycling idea!


    Pin It button on image hover