Showing posts with label diy. Show all posts

Friday, May 05, 2017

Spring Sunglasses refashion - fix & restyle

What happens when your favourite pair of sunglasses, ends up with a broken arm?

You should know better and use a sunglasses case before throwing them into that huge bag, full of "necessary" stuff you carry around all day long! Ehm..too late!
Well get over it and lets fix this!


• Clean the surfaces. Use a drop of superglue and attach the two pieces together.
• Hold them firmly attached for a minute or two, until the glue dries.
• Pick some embroidery thread (or any other type of thread) in colors of your liking.
• Use a tiny dot of superglue to keep the thread edge in place and start to wrap around the arm. Continue wrapping in different colors, as you would do in a friendship blacelet.
• Avoid overlaping the thread while wrapping for a smooth and bump free result. Secure thread ends with glue.
• Well done!!! Enjoy your new pair of old sunglasses!!!!


Saturday, January 16, 2016

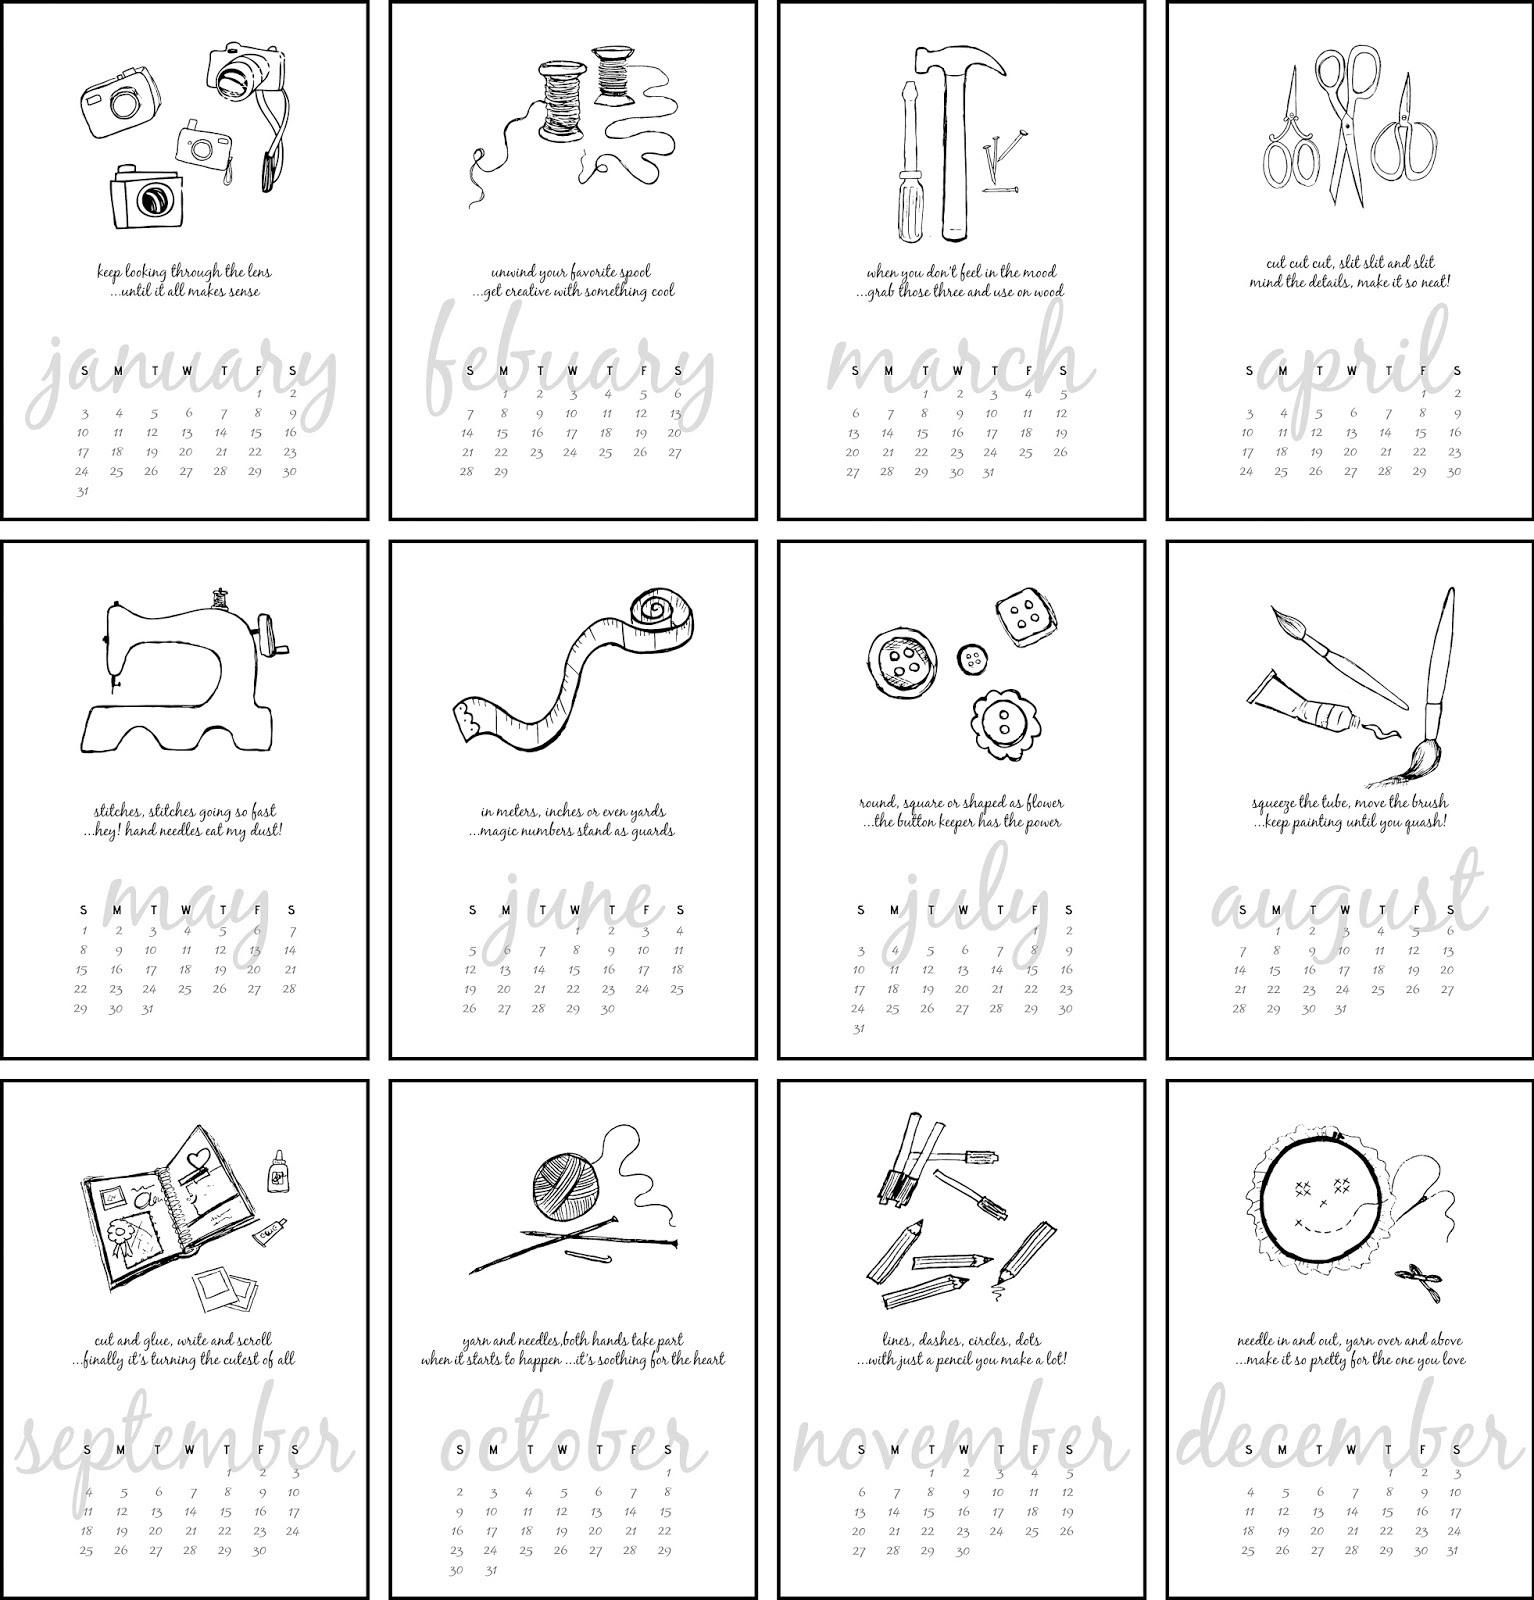
FREE Printable Calendar 2016 | 12 Crafty Coloring Pages

Happy new year everyone!
I thought it would be fun to make a calendar with a crafty theme, for the new year. I started doodling on a sketch pad and here's what came out!

I'm very happy to share it with you!
You can download 12 different pages (one for each month) + 1 calendar cover in two sizes.
Choose the size you like, download from the links at the end of this post and print it yourself. 
I've attached two diferent sizes: 
• A4 - 21 x 29,7cm - to be printed full page
• A5 - 14,85 x 21cm - each file includes 2 -A5 pages to print in a full A4 (and avoid paper waste)

*The ideal paper weight is at least 160gsm

You can display it in black & white or color it yourself!
Twelve craft themed coloring pages for a relaxed evening by the fireplace.


 Display it on a stand or attach a board clip and hang it on the wall.


Click the link of the preffered size and then click on the download arrow on the top center of the page to start downloading the files.


 I hope you have fun coloring it and find a lovely spot to style it in your craft room!

Where would you place it??? I'ld love to know If you like it and see what you have done with it! Please share your impressions and photo links in the comment section below! :-)

FREE Printable Calendar 2016 | 12 Crafty Coloring Pages
make animated gifs like this at MakeaGif

Thursday, November 05, 2015

Inspiration...and some paintbrush cleaning tips


After a long and joyful game with aclylic paints, I ended up with a finished project, a big mess, a few orange and blue {permanent} stains on my shirt, rainbow hands and a lot of dirty brushes!

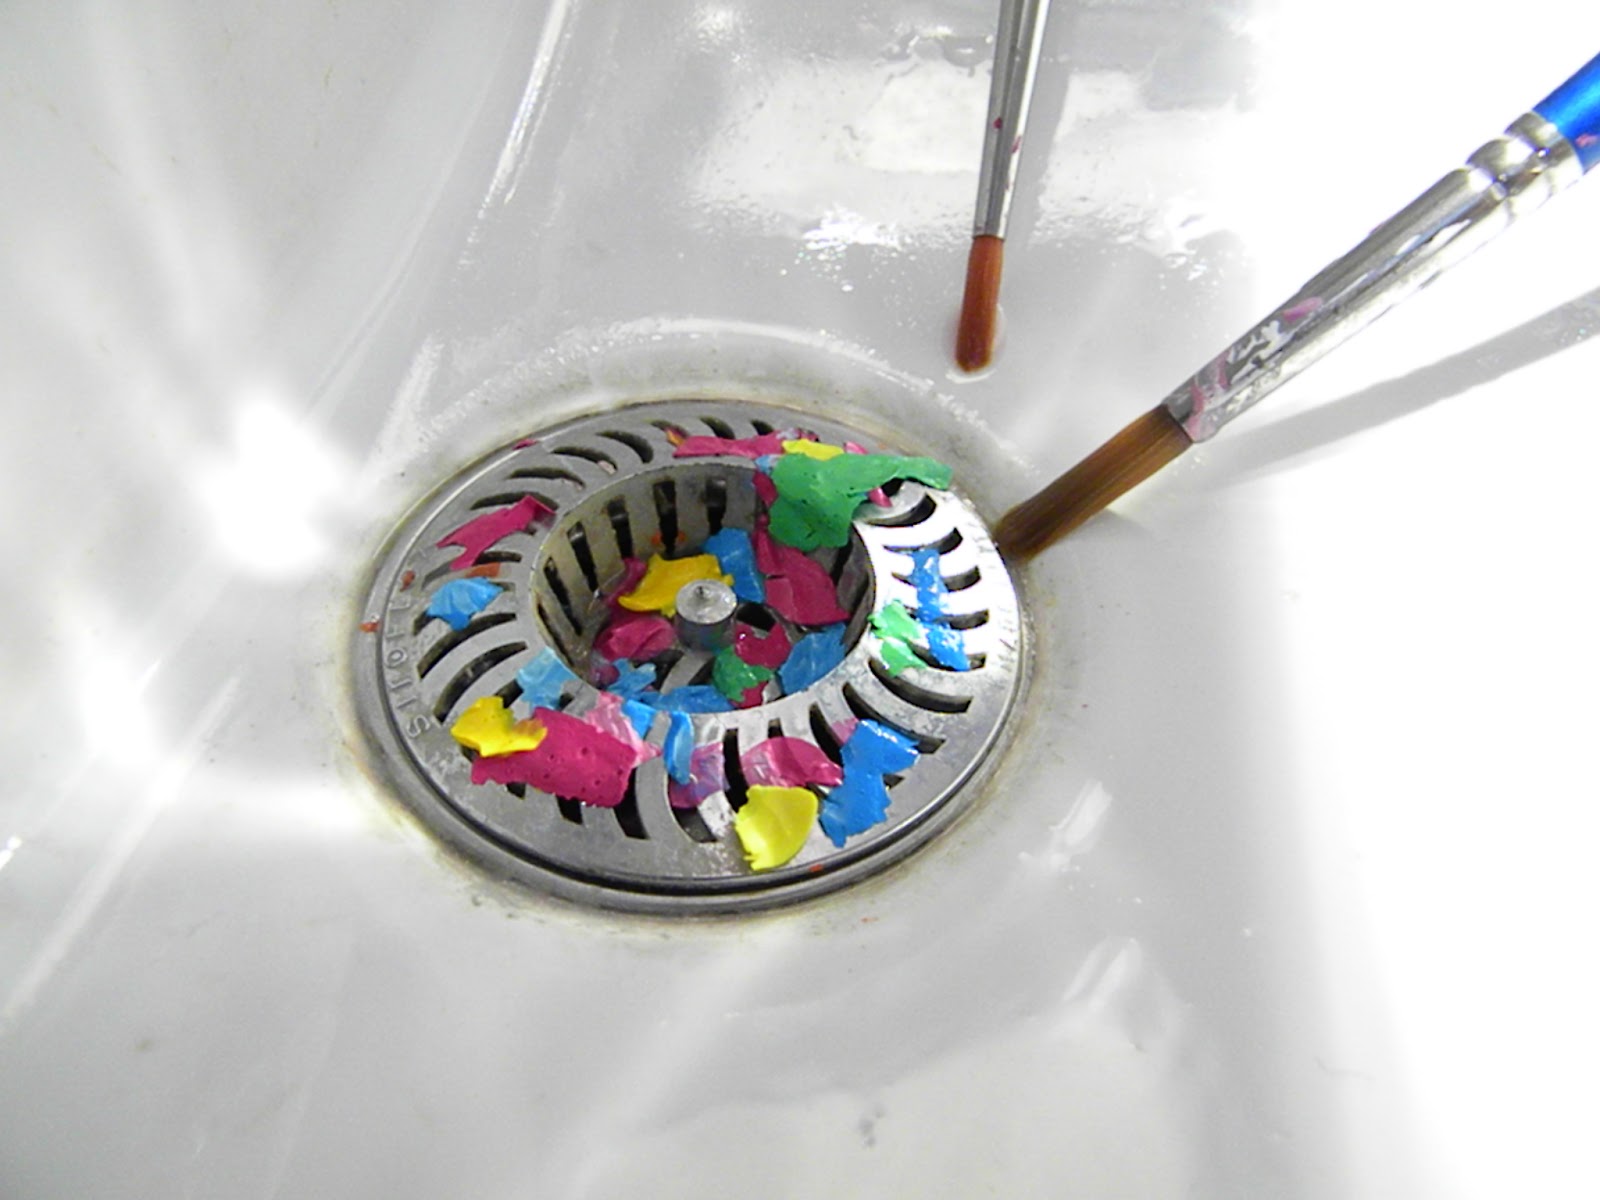
I always start cleaning my painting tools with the palette, as the remains of paint dry fast and sometimes they need to soak before washing. A little bit of warm water, a slight rub on the dry paint...and there it was! The color peels were so beautifully arranged in my sink, that I run to grab my camera!  I thought it was pretty inspiring and I had to share. :-)


Next person in cleaning queue is The Jar. Throw away the dirty water and wash it thoroughly. You can also clean the colors with dish soap on a sponge and make it as good as new. Well...I'm not that kind of person...the one pictured bellow is my favourite jar in the whole world. We've been painting together for about five years and I love every single dash of color on it!


Then the paintbrushes. You can just rinse them with water and let them dry. My way though, includes a bar of soap. If you are using water based colors, rinse away all the paint until the water comes clean and then rub your brush on a bar of soap. I'm using traditional olive oil soap because I think it keeps the hair more soft and flexible. You can also use liquid hand soap or really any kind of soap. Most of the times you will see that there was more paint hidden in there and the foam helped it come out. Massage it for a sec with your fingers and then rinse the foam. Dry it with a towel (your moves should follow the hair direction) until all the water traped in there is absorbed. ALWAYS keep in upright position with the wooden stick downwards and hair facing up (make sure that there's no more water close to the metalic parts that holds the hair, to avoid rust). Another way is to lay them flat or place them on a special brush stand that keeps the brush upright and hovering. 


If you are using oil paints, clean the brush with white spirit or thinner first and then use the same procedure. You might need to soap it more than once to clean all the oil.
This way you can clean every kind of paint brush or roller, even the ones used to paint the house.


Do you get easily inspired from everyday things as I am? I would love to know! Please share in the comments below.
What was the last crazy thing that gave you a flash of inspiration?

Wednesday, April 16, 2014

3 Amazing Easter Crafts to Try!


Easter is not only about fresh flower arrangements and dyed eggs. Creativity shows the way on holiday crafts too. I needed to make something really colorful, impressive and very original, but not move too far from tradition. Here's what I've made this year. You can follow my tutorials and make these mind-blowing crafts for this Easter.


◄ Decorate Easter Eggs with Embroidery Stitches


I love embroidering on unconventional materials! I admit it was a bit tricky, since eggshells are very fragile... but the result is rewarding!

 Follow the step-by-step tutorial and make your own gorgeous embroidered eggs!

◄ Needle-Felt the Cutest Easter Bunny


Wool is such an amazing material! It can take so many forms and uses. Just use the right technique according to what you are making and the possibilities are endless. This tutorial is an introduction to needle-felting and it shows you  how to make a little creature with just a handfull of roving and a felting needle!

Following this detailed step-by-step guide will help you understand how needle felting works but it will also show you how to make this cute grumpy face!
HOW TO MAKE A CUTE NEEDLE_FELTED BUNNY FOR EASTER

◄ Make Gorgeous EggShell Mosaic Eggs


Mosaic tiles from eggshells? Yes, sure! Take advantage of the shells fragility and create amazing pieces of art on about any stable surface. In this case I've used this technique to decorate colorful and ombre Easter eggs.

Check the step-by-step photo guide on how to make a mosaic eggs, using the shells themselves!
HOW TO MAKE MOSAIC SHELL EASTER EGGS


 *** don't forget to check my last year's "Pysanky"tutorial. It shows the easiest way to make eggs with the waxing technique, by using household items.
PYSANKY EASTER EGGS, PAINT IN WAX


Happy Easter Holidays!! :-)

Saturday, March 22, 2014

DiY: Make an Embroidered Canvas Wall Hanging

I have a huge crush on embroidery lately! Well Ι'm not a really conventional type...so i was thinking about embroidering on something further than fabric? or maybe an object? I decided to start the safe way, with something very close to fabric: painting canvas.


You will need:

◄ Canvases in two sizes
◄ Embroidery floss
◄ Needle
◄ Coloring Pencils
◄ Branch
◄ Beads
◄ Drill (optional)
 ____________________________________________________________

Draw your design on the canvas. Use the right colored pencil according to the matching thread of each line.


Thread your needle and start stitching on the lines. Change thread color when necessary.


Use the appropriate kind of stitch depending on your design.


Finish all the little canvases. 


Create a more detailed embroidery design on the large canvases.


When you have finished all the canvases, play around with the possitioning to decide the arrangement. For example, i made two bicycles which will be on the bottom of the arrangement. The cloud and butterfly will be hanged above the bikes and the flowers next to the bicycles on the "supposed" land line. You can hang each on a different string or combine some on the same one, but in differend heights.


 Use a very small drill to make holes n the canvas. Push the string through the holes.


Pull a bead through the end of the string. Make a big knot at the very end. This will hold the string in place.


Choose a lovely long branch and hang your artwork according to the desired arrangement.


..and you are done! We've just brought spring inside while creting a lovely wall decoration!


Two days ago, we celebrated the 1st Day of Spring! I've  filled the vases with wild flowers and made a Spring embroidery canvas wall hanging. Do you have any craft ideas on how to bring spring colors in the house? Share in the comments bellow!

Tuesday, August 13, 2013

DiY: Concrete - Cement - Plaster crafts

Call it cement, plaster or concrete. It's grey, strong, stiff and can take just about any form!
This ordinary construction material is becoming a huge design and interiors trend and I love working with it. With very little effort and a dash of imagination you can make great pieces of design for your home.

Check out my new tutorials and learn how to make gorgeous concrete decoration items, always following the rules of geometry and modern style.

How to Make a Geo Faceted Cement Planter

 Just Click on the link under each photo and read the step-by-step tutorials!

Learn How to Make Industrial-Style Geo Cement Coasters
I'd love to see your version of my tutorials! Leave your link on the comment section bellow.
Enjoy crafting! 

 ✂ ✂ ✂ ✂ ✂ ✂

Tuesday, April 23, 2013

DiY - Pysanky Easter eggs, Paint in wax!


"...A “pysanka” (plural: pysanky) is a traditional Ukrainian Easter egg and originates from the verb pysaty, which means “to write”. The designs are written on the eggs with beeswax..."


Learn how to make these gorgeous Easter eggs, using a traditional technique!
View my complete step-by-step tutorial here:

Crafttuts+: make vibrant Pysanky eggs for Easter

Good luck with yours! and have a wonderful Easter! :-)

Saturday, February 09, 2013

Four heart-shaped DiY projects!


Hey all! It's been a while...but i came with my arms full of goody tutorials!
Well I'm not really a "valentine's day" person! I'm not fond of heart shaped candyteddybearflowerchocolatejewelrylittleitsybitsythingies! But as a crafter, it was a big challenge to work on my new projects, with a special heart-shaped theme. I actually realized that a heart,can be a really interesting shape with lots of design variations...

Bellow you can find four of my new (beginner to advanced) DiY projects with red hearts.
Follow the links under each photo to read the step-by-step guides.


✂  ✂  ✂  ✂  ✂  ✂  ✂  ✂  ✂  ✂  ✂  ✂  ✂  ✂  ✂  ✂  ✂  ✂  ✂  ✂  ✂  ✂


✂  ✂  ✂  ✂  ✂  ✂  ✂  ✂  ✂  ✂  ✂  ✂  ✂  ✂  ✂  ✂  ✂  ✂  ✂  ✂  ✂  ✂


✂  ✂  ✂  ✂  ✂  ✂  ✂  ✂  ✂  ✂  ✂  ✂  ✂  ✂  ✂  ✂  ✂  ✂  ✂  ✂  ✂  ✂


✂  ✂  ✂  ✂  ✂  ✂  ✂  ✂  ✂  ✂  ✂  ✂  ✂  ✂  ✂  ✂  ✂  ✂  ✂  ✂  ✂  ✂  

Yes you got it right!!! BlackRedDots is the new author for CraftTuts+.
You can find all my tutorials HERE.

I hope that you like them and I'd love to see what you've made out of them! So if you like to share your creations, any questions or suggestions, please leave a comment at the "comment section" under each tutorial.
:-)

Thursday, September 27, 2012

Back to School DiY - Notebook Makeover!


 Back to school!!
Turn your dull notebooks into colorful, super trendy artworks!


you will need:
✂ soft cover notebook  
✂ hard cover notebook
✂ fabric
✂ embroidery thread
✂ embroidery needle
✂ scissors
✂ white thick glue


Thread your needle with the embroidery floss and make a little knot on the edge. Make a hole through the soft cover. Pull the thread all the way through and decide the shape you want to give.
You might need to push the needle through the same hole over and over. Make sure you are not pulling too hard.


Keep going with the long stitches adding new colors of thread.


Stop when you feel you have the desired result.

✂ ✂ ✂ ✂ ✂ ✂ ✂ ✂ ✂ ✂ ✂ ✂

Put the hard cover notebook on the fabric wide open (wrong side up).
Draw a rectangle around, larger that the notebook. About 1,5cm for the top and bottom kai about 2-3cm for the sides.


Start gluing the fabric on the covers using a thick glue and a paintbrush. If you use normal liquid glue you will end up with glue stains on your fabric. When you have secured the one side on the cover, pay attention to the spine. Make two slids for the spine piece and cut it off. Continue folding the side pieces and glue them down.


When you finish you will end up with something like the photo above.


 For a cleaner finish glue the first and the last white page of the notebook onto the fabric you have just glued, hiding the trim pieces.

You are done! Now you can decorate your notebook with ribbons, buttons, lace and anything you like!


Have a great new school year!


Pin It button on image hover