Thursday, September 27, 2012

Back to School DiY - Notebook Makeover!


 Back to school!!
Turn your dull notebooks into colorful, super trendy artworks!


you will need:
✂ soft cover notebook  
✂ hard cover notebook
✂ fabric
✂ embroidery thread
✂ embroidery needle
✂ scissors
✂ white thick glue


Thread your needle with the embroidery floss and make a little knot on the edge. Make a hole through the soft cover. Pull the thread all the way through and decide the shape you want to give.
You might need to push the needle through the same hole over and over. Make sure you are not pulling too hard.


Keep going with the long stitches adding new colors of thread.


Stop when you feel you have the desired result.

✂ ✂ ✂ ✂ ✂ ✂ ✂ ✂ ✂ ✂ ✂ ✂

Put the hard cover notebook on the fabric wide open (wrong side up).
Draw a rectangle around, larger that the notebook. About 1,5cm for the top and bottom kai about 2-3cm for the sides.


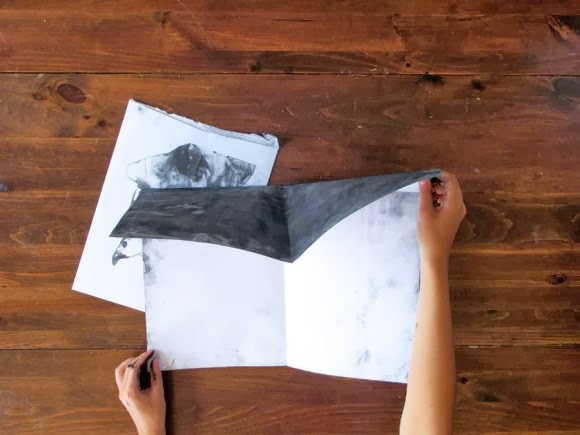
Start gluing the fabric on the covers using a thick glue and a paintbrush. If you use normal liquid glue you will end up with glue stains on your fabric. When you have secured the one side on the cover, pay attention to the spine. Make two slids for the spine piece and cut it off. Continue folding the side pieces and glue them down.


When you finish you will end up with something like the photo above.


 For a cleaner finish glue the first and the last white page of the notebook onto the fabric you have just glued, hiding the trim pieces.

You are done! Now you can decorate your notebook with ribbons, buttons, lace and anything you like!


Have a great new school year!


Monday, June 11, 2012

Geometric stamps - Do it Yourself


Geometric shapes are a big trend in 2012! This is a very simple way to make geometric stamps and refashion all your dull objects!

Materials:
*carving tools
*erasers
*exacto knife
*stamping ink
*wooden toy blocks *pen


You can start from the easiest way. Cut the eraser rubber in squares and triangles. Your first geometric stamp is almost ready!


 Next step: mission circle! Draw a circle on the eraser, then cut the excess with the exacto knife and make the finish touches with the round carving tool!
The secret in every stamp you make, is to regularly stamp on a piece of paper and check if the shape has flaws!


You follow the same procedure for every shape, just remember that in repeated shapes you cut only half way down the rubber.


 Carve the shapes you want and then glue them on a wooden block. You have to do that, to ensure that the pressure is equal allover the surface when stamping.


And you are done! You have created a geometric stamp set!
You can restyle decorative objects, make paintings, decorate fabric or even clothes!
Good Stamping!!!!


Friday, April 27, 2012

Spring DiY Project !!! - Upcycle flower pots!


You will need: 
1 old flower pot 
3 or 4 smaller ones
1 old broom stick (or metallic pipe)
plants 
soil

You need a way to make your broom stick stable inside the big pot, so as to hold the weight of the smaller pots later on. You can use plaster or cement on the bottom of the pot. I wanted the most ecologic way so i used another pot! I made a few holes at the bottom and a big one in the middle for the stick. Pushed through the stick and filled it up with soil. I poured some water as i was filling it, to make the soil more compact. You can leave it to dry and push it hard to make it as compact as possible.


Then put the big pot (upside -down) on top of your filled pot and then turn them both around (if you just turn the filled pot in the bigger one..you might end up spilling all the soil). Fill the big pot up with soil!


Water the soil as to avoid any air between the small pot and the soil. Push the soil down with your hands.Try to move the stick towards the sides to check its stability!


Now its time to prepare the small pots. Take a sharp knife and make some equidistant cuts at the bottom, trying to end up with a star. This is a very nice way to avoid large holes that let the soil go through when watering the plants, but also because the cuts add pressure on the stick and stay in place.


Try to make your star on the side, to create this falling effect. Ιn this case i have used plastic pots. If you are using ceramics it is better to use the already made holes.


When you are done with all the pots, just pushed them through the stick.
Fill them up with soil, your favorite plants...and you are ready!


A great solution for a tiny balcony! And a wonderful recycling idea!


Friday, March 23, 2012

Organize your desk, by eating COOKIES!!!!


Is it possible to organize your space by eating cookies???? Oh! yes it is!!!
As long as you keep the tin boxes!

Γίνεται να οργανώσεις τον χώρο σου τρώγοντας μπισκότα??? Φυσικα και γίνεται!!! 
Αρκεί να μην φας και τα κουτιά!


Θα χρειαστείτε: 
♦διαφορετικά μεγέθη μεταλλικών κουτιών απο μπισκότα (αν δεν ειναι απο μπισκότα δεν φτιάχνεται!!) ♦ντίζα (κοινώς μια βέργα - βίδα) 
♦ροδέλες & παξιμάδια αναλόγων μεγεθών 
♦σφυρί ♦ατσαλόκαρφα 
♦φελλό ή καουτσούκ


Turn the first box upside down and mark the center. Draw around the rod's perimeter. Use a nail and the hammer, to make holes around the circle. Use the cork underneath. You can also use a drill for this step.. but i like more traditional ways!


Γυρίστε το πρώτο κουτι ανάποδα , σημαδεψτε το κεντρο του πάτου του και ζωγραφίστε την περιμετρο της ντίζας. Χρησιμοποιώντας το ατσαλόκαρφο, κάντε τρυπίτσες γυρω απο τον κύκλο, βάζοντας τον φελλό απο κάτω. Αν έχετε τρυπανάκι παραλείψτε αυτο το βήμα... αν προτιμάτε τις παραδοσιακές μεθόδους μην το παραλείψετε..αν βρείτε και κάποιο άλλο τρόπο...κάντε το!


You have created a hole. The swarf is useful because it keeps the box from sliding down the rod. Push the rod through the hole and leave a few inches before the edge. Put a washer and the screw a nut at the bottom of the box. Use another washer and nut and then the cap of the box upside down. Secure in place with one more nut at the very edge of the rod. This will be the stand's base!


Έχετε δημιουργήσει μια τρύπα! Τα γρέζια απο το κόψιμο μας βολεύουν στο να μην γλυστραει το κουτι. Περάστε την ντίζα μέσα απο την τρύπα, αφήνοντας μερικα εκατοστα πριν το τέλος της. Περάστε μια ροδέλα και βιδώστε ένα παξιμαδι. Περάστε άλλο ένα παξιμάδι και μια ροδέλα.. και περάστε το καπάκι του ενός μεγάλου κουτιού ανάποδα. Ασφαλίστε με ενα τελευταίο παξιμαδι στο τελος της ντίζας. Αυτή θα είναι η βάση!


Do the same for the rest of the boxes, from the other side of the rod, leaving the distance you like between them. Always use washers and nuts at the bottom and the inside of the boxes, for extra stability.

Με τον ίδιο τρόπο περάστε και τα υπολοιπα κουτιά απο την άλλη μερια της ντιζας, αφήνοντας την απόσταση που σας βολεύει, ανάμεσα τους. Χρησιμοποιήτε πάντα ροδέλες & παξιμάδια, κάτω αλλα και στο εσωτερικό των κουτιών για περισσοτερη σταθερότητα.


In this case, i used two caps for the base. The one over the other, to keep it more stable and get an extra tray on my stand. You can add as many boxes you like, and use any shape or size you want!

Εδώ χρησιμοποίησα δύο καπάκια απο κουτιά στη βάση, το ένα πάνω στο άλλο, για μεγαλύτερη σταθερότητα και μία επιπλέον θήκη στο σταντ μου. Μπορείτε να προσθέσετε όσα κουτιά και σε ότι σχήμα και μέγεθος θέλετε!


Start eating those cookies!!!
Ξεκινήστε να τρώτε μπισκοτα!!!

Saturday, January 21, 2012

{ Posters vol.II } - Get dirty!

Interactive posters by Ronald Reiner Tiangco!
Here is a sample of his amazing work!


A poster the recipient completes by revealing spot-varnished type with hands made dirty by handling the poster, the back of which is coated with powdered pigment. Hand silkscreened poster with envelope.
This is the first of a series of posters.

Later on we will have the chance to meet his work, with a post dedicated to this brilliant designer!

Tuesday, January 17, 2012

Vintage posters from the future

 Did you know that internet services were advertised, before they even existed???


Amazing?
These brilliant posters were actually created by a Brazilian advertising agency 
for the Maximidia Seminars in 2010.
Their slogan was “Everything Ages Fast”!


Saturday, January 07, 2012

Happy and delicious new year!!

Happy New Year!!!
May this year be the most creative, happy, loving, funny, sweet one of our lives!

Little late for new year's wishes... but i couldn't show up with a new post, without a sweet treat first!


I've always been in love with all kinds of jars and boxes!
When i was a child i adored those tin cookie boxes! I used to collect them and hide my precious treasures in there...(after emptying them of course ...soooo yummy.....)!!
Lately i discovered that a  greek biscuit brand still sells them!!!
And heres my first one after so many years! Filled with Butter Cookies!!!

I couldn't be as selfish as to keep them all for myself!
So...treat yourselves!!!


Pin It button on image hover